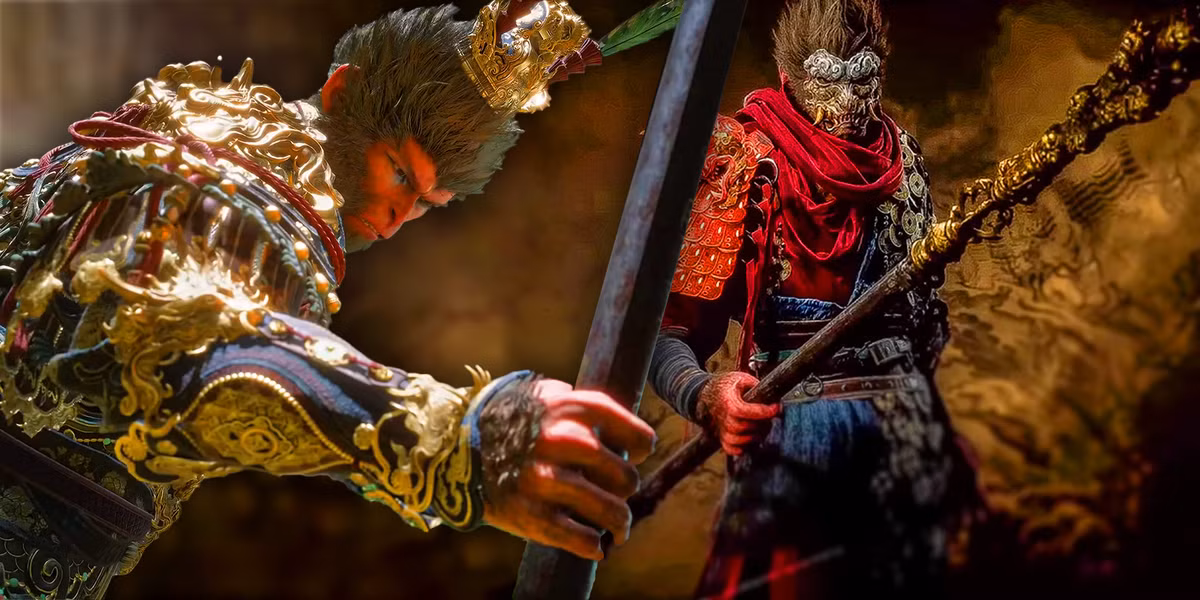
Black Myth Wukong Boss Tier List | My Ranking After 113 Fights
Want to beat every boss? My Black Myth Wukong tier list shows you who’s tough, who’s weak, and who’s just annoying.
Jan 18, 20269.8K Shares338.8K Views
My Experience Ranking Every Boss In Black Myth: Wukong
After spending countless hours fighting all 113 bosses in Black Myth: Wukong, I’ve learned one thing: not all boss fights are created equal. Some had me ready to throw my controller, while others felt like warm-ups before the real battle.
When I first picked up the game, I thought I knew what to expect. I was wrong. Every chapter brought surprises, tough moments, and fights that tested everything I knew. But honestly, that’s what made the journey so good.
So here’s my complete Black Myth Wukong boss tier listbased on what I played, felt, and figured out along the way. I’m not just ranking them by how hard they are. I’m showing you which fights were the most fun, the most meaningful, and the ones I’ll never forget.
How I Rank These Battles
I don't just throw bosses into categories based on how many times they killed me. My ranking system looks at three key things that matter most to players like us.
- Difficulty balance comes first. The best bosses challenge you without feeling unfair. They push your skills to the limit while giving you clear ways to improve and overcome them.
- Design quality is equally important. Great bosses have memorable movesets, stunning visuals, and mechanics that feel fresh. They're the fights you want to show your friends.
- Player experience ties it all together. The most satisfying bosses teach you something new about the game while delivering those "holy crap, I did it" moments we all love.
The Tier Breakdown
S-Tierrepresents perfection. These bosses showcase everything Black Myth: Wukong does right. They're tough but fair, beautiful but deadly, and unforgettable.
A-Tierbosses are excellent encounters that might have one small flaw keeping them from greatness. Maybe they're a bit too punishing or slightly repetitive, but still fantastic fights.
B-Tierincludes solid, dependable bosses. They won't blow your mind, but they serve their purpose well and provide good challenges without major issues.
C-Tierbosses are functional but forgettable. They fill their role in the game's progression but don't offer anything special to remember them by.
D-Tierrepresents missed opportunities. These fights either feel unfinished, overly frustrating, or just plain boring compared to what the game is capable of.
S-Tier Bosses: The Legendary Encounters
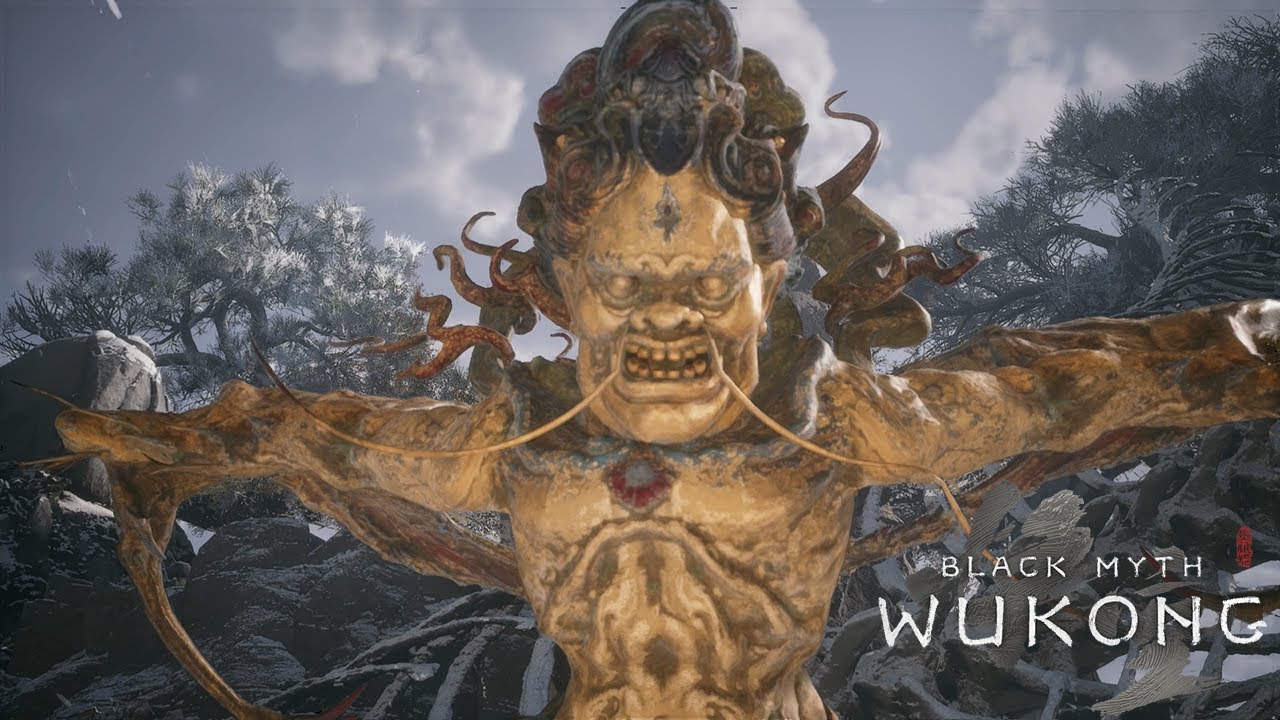
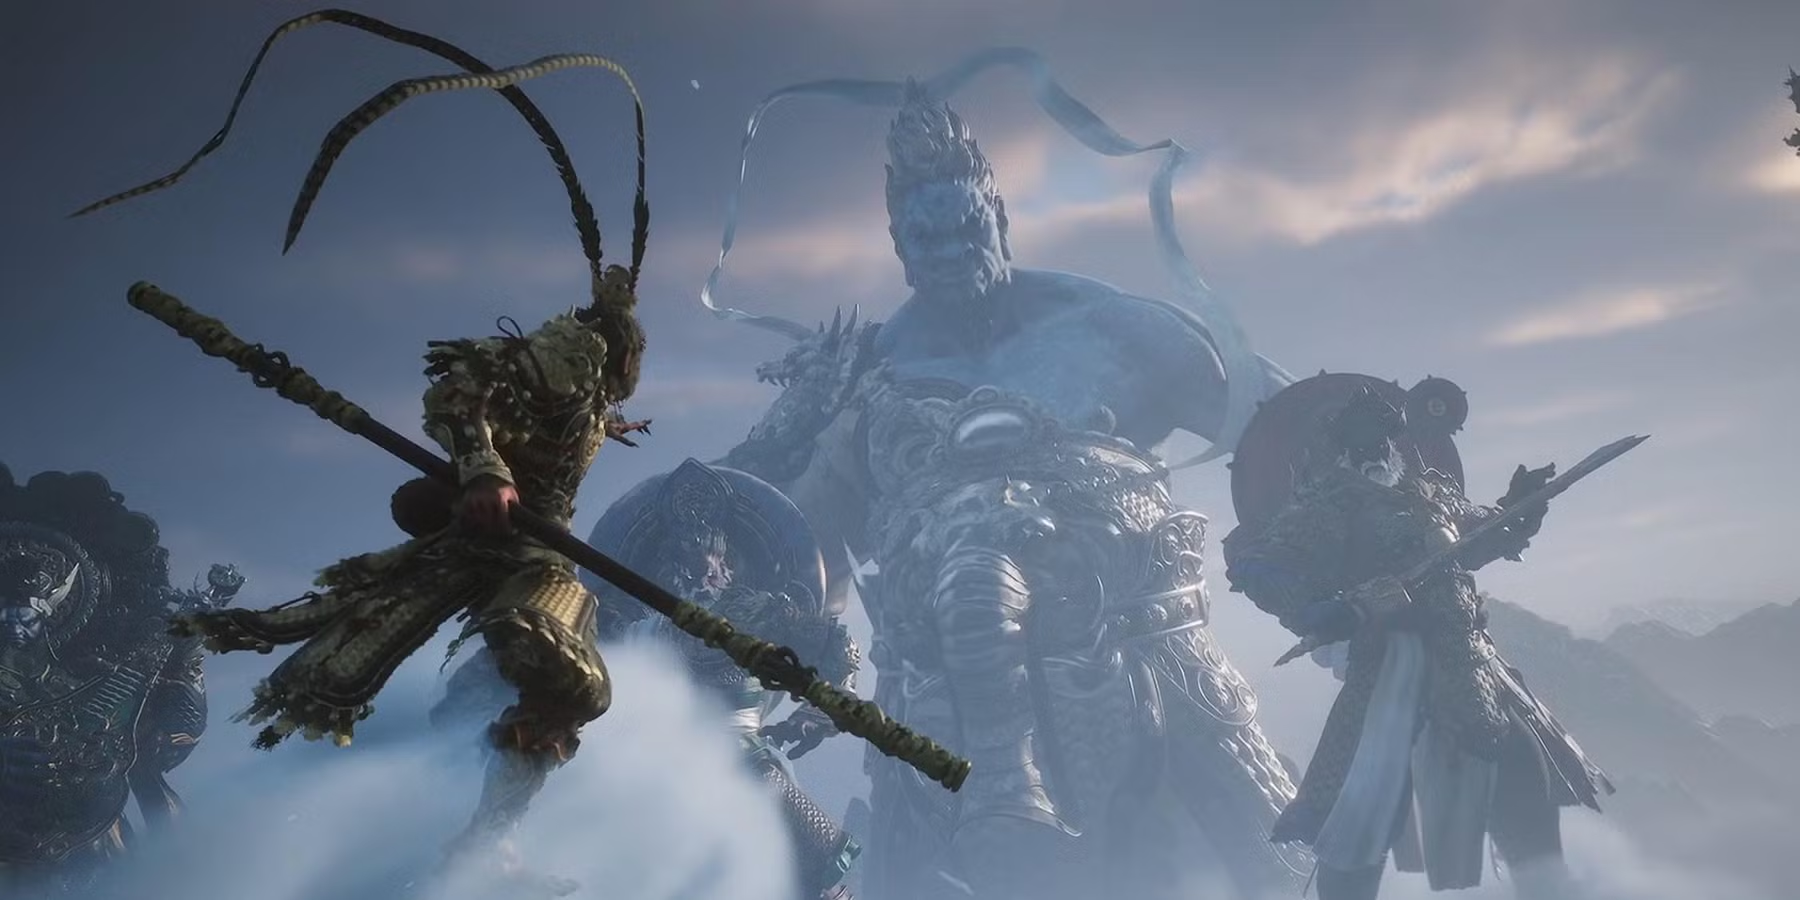
Erlang Shen (Erlang Sacred Divinity)
This is it. This is the boss fight that defines Black Myth: Wukong. I'm not exaggerating when I say Erlang Sacred Divinity is the most complete boss fight in the entire game.
He's the final exam for everything you've learned. First phase tests your spacing and patience. He throws those massive weapon swings that cover half the arena, so you need to learn when to get close and when to back off. I died probably 20 times just figuring out his reach.
Second phase cranks up the speed. Suddenly this guy who seemed slow is moving like lightning. His combo attacks chain together in ways that punish you for being greedy with damage. I had to completely change how I approached him.
Third phase? That's where the real magic happens. He starts mixing in ranged attacks, area denial, and these weird teleport combos that made me question everything I thought I knew about the fight. When I finally beat him after three solid days of attempts, I literally stood up and cheered.
Yellow Loong
Hidden in Chapter 2, this dragon is everything a secret boss should be. You have to work to find him, and boy is it worth the effort.
The fight starts on the ground, and I thought "okay, this is just another big enemy." Then he takes to the air and everything changes. You're fighting in three dimensions now, trying to hit a target that's constantly moving while dodging lightning bolts that turn the ground into death zones.
What I love about Yellow Loong is how fair he feels despite being incredibly difficult. Every attack is telegraphed clearly, but the timing windows are tight. His lightning attacks create these beautiful but deadly patterns across the arena. You're not just fighting a boss, you're dancing with one.
The Great Sage's Broken Shell
Fighting a broken version of Sun Wukong himself hits different emotionally. This isn't just another monster; this is what our hero could become if everything went wrong.
His attack patterns are deliberately chaotic and unpredictable. Where other bosses have clear tells, Broken Shell mixes things up constantly. Just when you think you've figured out his combo, he throws in something completely different.
I spent hours trying to apply normal boss strategies to this fight before I realized that was the point. You can't treat him like a regular enemy because he's not one. He's broken, and that brokenness is reflected in how unpredictably he fights.
When I finally won, it felt less like defeating an enemy and more like helping put something out of its misery. That's powerful storytelling through combat.
Red Loong
This optional dragon boss from Chapter 1 probably catches most players off guard. You can find him hidden away, and he's significantly harder than anything else in the opening chapter.
Red Loong taught me that optional bosses in this game aren't just side content; they're often the best content. His fire-based attacks create persistent hazards that change how you move around the arena. You're not just dodging attacks; you're managing space.
The fight has this great rhythm to it. Aggressive phases, where you can get in close, followed by area denial phases where you need to play defensively. Learning to read these transitions and adapt your strategy accordingly feels incredibly satisfying.
Related Reading: Genshin Impact Tier List
A-Tier Bosses: Elite Encounters
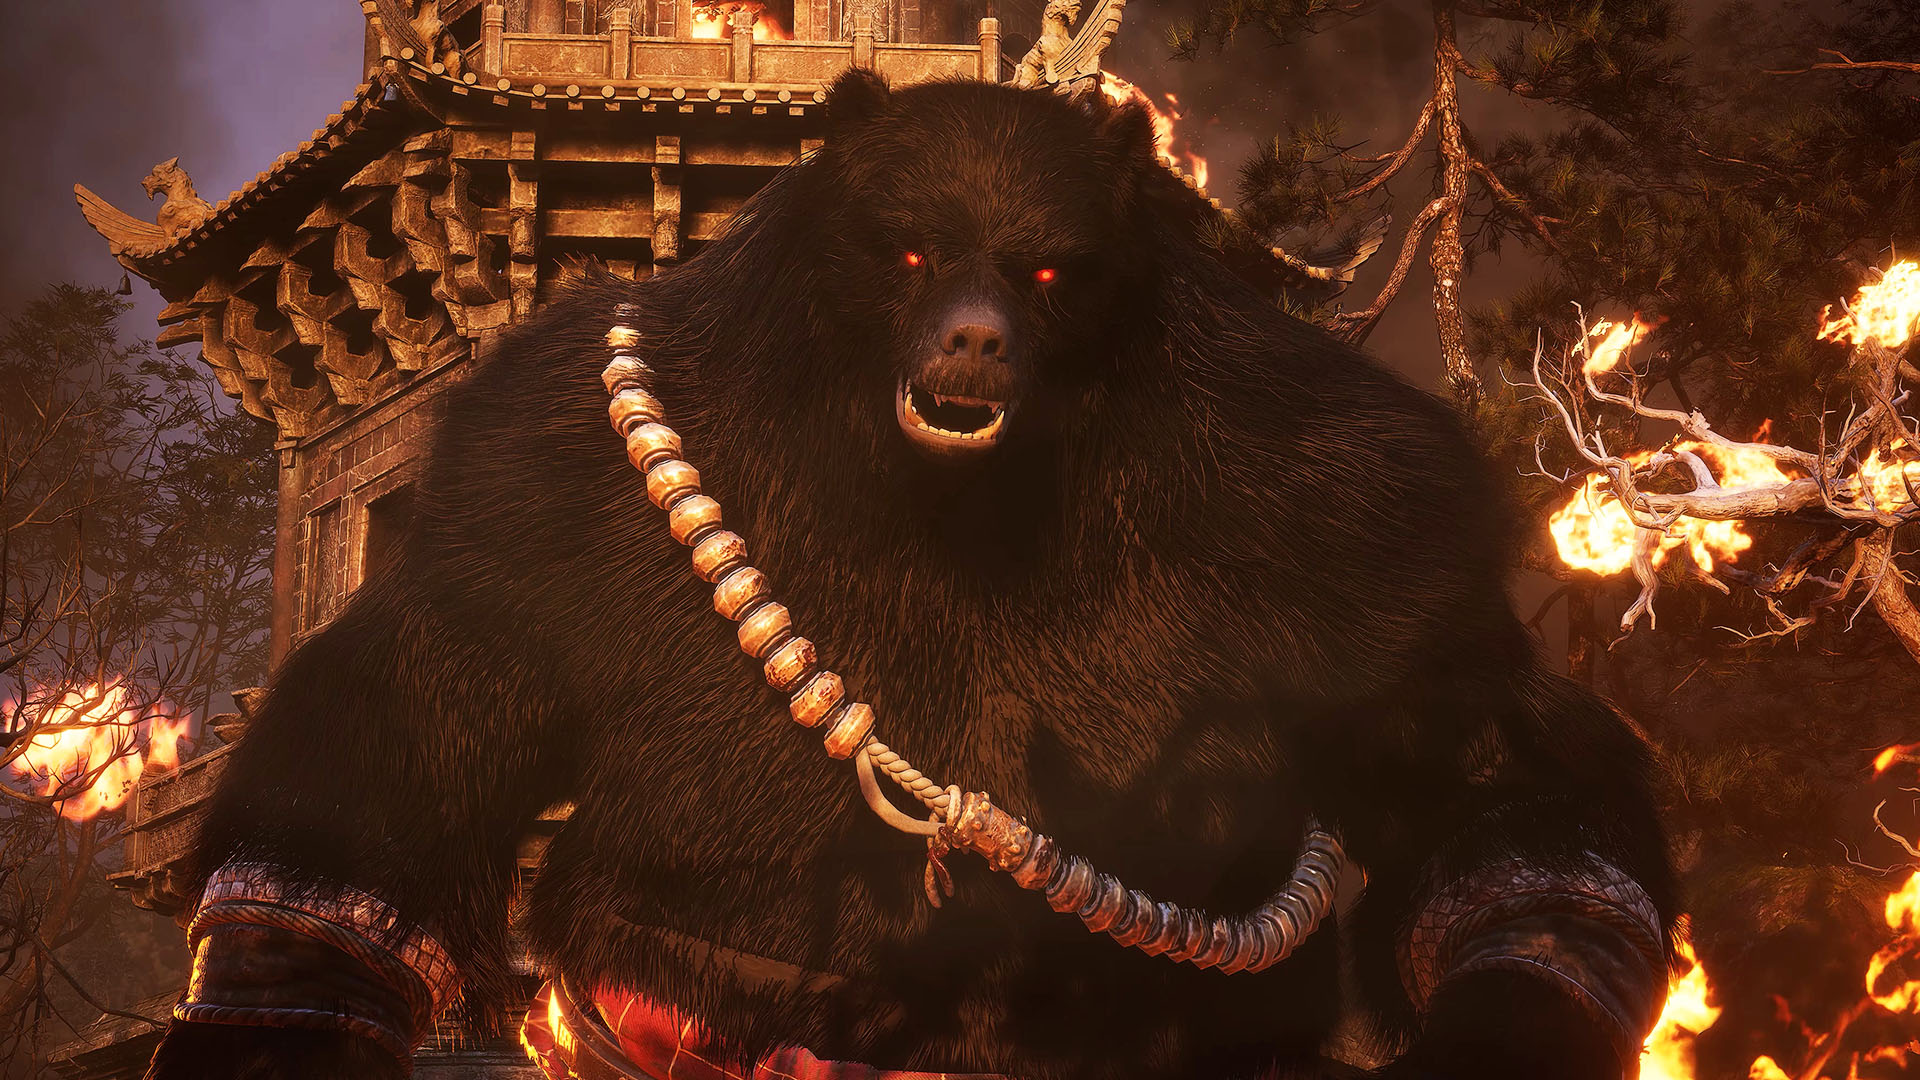
Black Bear Guai
The final boss of Chapter 1 and your first real test. Black Bear Guai is where the game stops holding your hand and starts showing you what you're in for.
This big furry guy hits like a truck and moves faster than you'd expect for something his size. I remember thinking "oh, it's just a big bear" and then getting demolished by his charging attacks. He covers distance so quickly that I had to completely rethink how I positioned myself.
His claw swipes have this deceptive range that caught me off guard constantly. Just when I thought I was safe at medium distance, he'd reach out and knock half my health away. Learning his attack ranges became crucial to winning.
Yellow Wind Sage
This Chapter 2 boss completely subverted my expectations in the best way possible. You see this slow, lumbering rat carrying a Buddha head and think you know what you're getting into. You don't.
When he sets down that Buddha head, everything changes. Suddenly, this slow enemy becomes incredibly agile and aggressive. It's like fighting two different bosses in the same fight, and you need completely different strategies for each phase.
The Buddha head phase taught me to be patient and look for openings. The agile phase forced me to stay mobile and think quickly. Having to switch between these mindsets mid-fight kept me constantly engaged.
King Of Flowing Sands
Another Chapter 2 standout that introduces environmental combat in the most elegant way possible. This sandy warrior doesn't just attack you, he reshapes the entire battlefield with his sand-based abilities.
His sand attacks create these shifting terrain hazards that completely change how you move around the arena. Safe areas suddenly become dangerous. Escape routes get cut off. You're constantly adapting to a changing battlefield.
I love how his moveset forces you to think three-dimensionally. It's not enough to dodge his direct attacks - you need to consider where the sand is going and how it'll affect your positioning for the next exchange. This boss taught me that environmental awareness is just as important as understanding enemy attack patterns. That lesson became crucial for later fights.
Kang-Jin Loong
The main story dragon boss of Chapter 3 delivers what I consider the game's most well-balanced dragon fight. Unlike Yellow Loong's complexity, Kang-Jin focuses on perfecting the fundamentals.
Every attack is clearly telegraphed, but the timing windows are tight enough to keep you honest. His breath attacks cover huge areas but give you enough warning to find safe spots. His physical attacks hit hard but have clear recovery windows.
What makes this fight special is how clean it feels. There's no confusion about what you should be doing - you just need to execute well. Sometimes that kind of straightforward challenge is exactly what you need.
I found myself coming back to this boss just for the satisfaction of fighting a well-designed encounter. It's like a perfectly balanced meal - nothing fancy, just everything done right.
Captain Lotus-Vision
This Chapter 3 boss wins A-tier through pure creativity. Fighting Captain Lotus-Vision isn't just about combat - it's about solving puzzles while someone's trying to kill you.
His illusion mechanics completely change how you approach targeting and positioning. You think you're attacking the real boss, but you're hitting air while the real one flanks you. It forced me to pay attention to subtle visual cues I'd been ignoring.
The fight has these great moments where you think you've figured out the pattern, only to discover there's another layer of complexity you missed. Each phase revelation felt like solving a puzzle piece.
I spent way too much time on this boss initially because I was approaching it like a normal fight. Once I started treating it like a puzzle that fights back, everything clicked into place.
Mad Tiger
The most challenging regular boss in Chapter 2, Mad Tiger lives up to his name perfectly. This guy is fast, aggressive, and relentless when he wants to be. His attack patterns mix fast combos with powerful single hits in ways that kept me constantly guessing.
Just when I'd get comfortable with his quick attacks, he'd throw in a devastating charge that reminded me to respect his damage output. What I appreciate about Mad Tiger is how he forces you to master both offensive and defensive play. You can't just turtle up and wait for openings because he'll pressure you constantly.
But you also can't go full aggro because he'll punish overcommitment hard. This boss taught me the importance of rhythm in combat. Learning to flow between aggressive and defensive play based on his behavior became essential not just for this fight, but for many others throughout the game.
B-Tier Bosses: Solid Challenges

Tiger Vanguard
The very first real boss many players encounter, Tiger Vanguard, sets a solid foundation for what's to come. He's challenging enough to make you work but fair enough that you can learn from your mistakes.
His attack patterns are straightforward but effective. Heavy swipes that you need to dodge, charging attacks that require good spacing, and combo sequences that teach you about attack rhythms. Nothing too fancy, but everything works well.
I appreciate how Tiger Vanguard introduces you to stance-breaking mechanics. His heavy attacks leave him vulnerable if you position yourself correctly, teaching you to look for these windows in future fights.
This boss does exactly what it needs to do, it's a skill check that prepares you for harder challenges without being overwhelming.
Guangzhi
This Chapter 1 optional boss is where many players first experience transformation combat, and he does it well. Guangzhi is fast and aggressive, forcing you to use your new abilities creatively.
His mobility can be frustrating if you try to fight him like a regular enemy. But once you start using transformations to match his speed or counter his movement, the fight becomes much more manageable.
I remember this being one of the first fights where I truly understood how transformations could solve problems rather than just deal damage. That lesson stuck with me throughout the entire game.
Wandering Wight
Another Chapter 1 optional that serves an important teaching role. Wandering Wight introduces you to enemies with unusual attack patterns and movement styles.
His projectile attacks force you to think about positioning and cover in ways the basic enemies don't. You can't just run straight at him - you need to use the environment and find safe approaches.
The fight isn't particularly memorable, but it's well-designed for what it needs to accomplish. It's a stepping stone that builds your skills for more complex encounters.
Elder Jinchi
This monk boss from Chapter 1 provides a nice change of pace with his more defensive, methodical combat style. Instead of rushing you down, he focuses on controlling space and punishing mistakes.
His healing abilities taught me about priority targeting and the importance of sustained pressure. You can't just hit him a few times and back off you need to commit to doing meaningful damage.
I found his defensive style refreshing after dealing with more aggressive bosses. It's a different kind of challenge that tests your patience and persistence rather than your reflexes.
Stone Vanguard
A solid mid-tier boss that epitomizes the B-tier category. Stone Vanguard is reliable, well-designed, and serves his purpose without trying to be more than it is.
His rock-based attacks create interesting patterns across the battlefield. Not as complex as environmental bosses like King of Flowing Sands, but engaging enough to keep you thinking about positioning.
The fight has a good rhythm to it, periods of pressure followed by windows for counterattack. Learning to recognize and capitalize on these moments feels satisfying.
Baw-Li-Guhh-Lang
This Chapter 1 optional boss might have the strangest name in the game, but his fight is pleasantly straightforward. He's a large, powerful enemy that teaches you about fighting bigger opponents.
His slow but devastating attacks require good spacing and patience. You can't rush in recklessly, but you also can't stay too far away or you'll never find damage opportunities.
I appreciate how this boss reinforces fundamental concepts without adding unnecessary complexity. Sometimes that's exactly what you need in a boss roster.
Various Spider Bosses (Chapter 4)
Chapter 4's Webbed Hollow is full of spider-themed bosses that all share similar design principles. They're competent encounters that teach environmental awareness and mobility management.
The web mechanics add an interesting wrinkle to standard combat. You're not just fighting the boss - you're managing hazards and terrain obstacles that can trap or slow you down.
None of these individual spider bosses stand out as exceptional, but collectively, they create a coherent chapter theme and provide consistent quality encounters.
Also Read: Attack On Titan Tier List
C-Tier Bosses: Standard Encounters
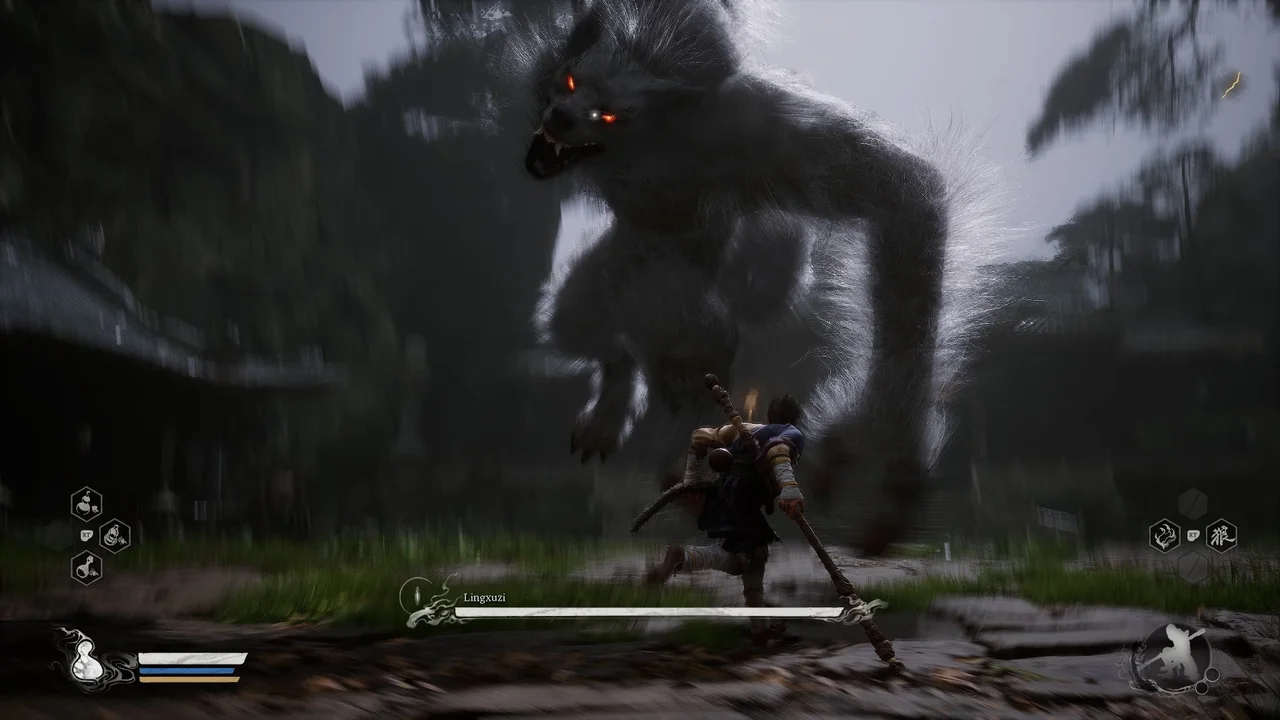
Lingxuzi
This Chapter 1 boss represents perfectly functional design without any particular standout features. Lingxuzi does his job adequately but doesn't offer anything memorable to distinguish himself from other encounters.
His attack patterns are basic and predictable. A few swipes, maybe a charge attack, nothing that will challenge experienced players or teach new ones significant lessons.
I used this fight mainly for testing out different spells and transformations since the stakes felt low. That's not necessarily bad - sometimes you need low-pressure encounters to experiment.
Man-in-Stone
Another Chapter 1 encounter that feels more like a mini-boss than a full encounter. Man-in-Stone has limited attack variety and fairly simple patterns that most players will figure out quickly.
His rock-throwing attacks provide basic projectile dodging practice, but nothing more sophisticated than what you'd expect from a tutorial-level enemy.
The fight serves its purpose in the game's progression without overstaying its welcome or creating frustration. Sometimes that's enough.
Whiteclad Noble
This boss falls into the "exists to fill a slot" category. Whiteclad Noble has some interesting visual design, but the actual fight mechanics are pretty standard fare.
His attacks hit reasonably hard but are telegraphed enough that avoiding damage isn't particularly challenging. The fight flows smoothly but without any memorable moments.
I found myself forgetting about this encounter shortly after completing it. That's the hallmark of C-tier - functional but forgettable.
Various Minor Yaoguai Chiefs
Throughout the game, you'll encounter numerous Yaoguai Chiefs that serve as stepping stones between major encounters. Most of these fall into C-tier by design.
They're meant to provide resources, test basic skills, and maintain pacing between more significant challenges. They accomplish these goals without trying to be more than they are.
Some players might appreciate these encounters more than I do, especially if they're struggling with the game's difficulty curve. They provide good practice opportunities without severe punishment for failure.
Cobra General
This snake-themed boss from the later chapters provides a competent but unremarkable encounter. His poison attacks add a mild status effect wrinkle to standard combat.
The visual design is solid and the fight mechanics work as intended. There's nothing wrong with Cobra General, he's just not particularly exciting compared to the game's standout encounters.
I remember this fight more for its placement in the chapter progression than for any specific mechanics or moments.
Mother Of Stones
A larger enemy that focuses on slow, powerful attacks balanced by clear telegraphs and recovery windows. Mother of Stones does the "big slow enemy" archetype competently.
Her rock-based attacks create some environmental hazards but nothing as complex or interesting as what you see in higher-tier encounters.
The fight works fine as a change of pace from faster enemies, but it doesn't bring enough unique elements to elevate it above standard quality.
D-Tier Bosses: Forgettable Encounters
Boulder Reacher
This Chapter 1 optional boss represents what happens when an encounter feels more like a chore than a challenge. Boulder Reacher has very limited attack variety and predictable patterns that become boring quickly.
His main gimmick involves throwing rocks and creating minor terrain changes, but these mechanics never evolve beyond their basic implementation. After the first few exchanges, you've seen everything he has to offer.
I found myself rushing through this fight just to get it over with. That's never a good sign for boss design.
Apramana Bat
Flying enemies can be tricky to balance, and Apramana Bat shows how not to do it. This boss spends most of the fight out of range, forcing you to wait for brief windows when he decides to come down.
The waiting game gets old fast. You're not learning new skills or facing interesting challenges, you're just standing around until the boss decides to let you play the game.
When he does attack, his patterns are simple and repetitive. There's no escalation or variety to keep the encounter engaging.
Non-Able
Despite having an intriguing name, Non-Able delivers one of the most forgettable encounters in the entire game. His attacks lack impact, his patterns are basic, and the overall fight feels like it was designed without much passion.
I struggled to find anything particularly interesting or challenging about this encounter. It exists, you fight it, you move on and promptly forget about it. Even the visual design feels uninspired compared to the game's generally high standards.
Pale-Axe Stalwart
This Chapter 3 encounter suffers from being too similar to earlier, better-designed bosses. Pale-Axe Stalwart feels like a weaker version of fights you've already experienced.
His axe attacks are slow and heavily telegraphed, but not in a way that creates interesting timing challenges. The fight becomes a simple matter of staying away from obvious danger zones.
There's no learning curve or skill development involved. You can win this fight using the most basic strategies without any adaptation required.
Venom Daoist
While poison-based mechanics could be interesting, Venom Daoist implements them in the most boring way possible. The status effects feel more annoying than challenging.
His attack patterns are generic, and the poison elements don't add meaningful complexity to the encounter. It's just regular combat with an irritating health drain.
I found myself using healing items more out of annoyance than genuine challenge. That's not engaging difficulty design.
Several Unnamed Mini-Bosses
Throughout the game, there are numerous small encounters that technically count as bosses but feel more like slightly upgraded regular enemies.
These fights typically last 30 seconds to a minute and don't offer anything unique in terms of mechanics or challenge. They exist to provide minor rewards and break up exploration.
While they don't actively hurt the game, they don't add much value either. They're the definition of filler content in an otherwise excellent boss roster.
Chapter-by-Chapter Boss Progression Guide
Chapter 1: Learning The Ropes
Chapter 1 serves as your extended tutorial, but don't let that fool you into thinking it's easy. Black Bear Guai is the final Black Myth Wukong boss in chapter one, and you're liable to use all the spells, abilities, and transformations you've collected thus far to beat him.
The chapter introduces you to different boss archetypes gradually. Fast enemies like Guangzhi teach dodging. Heavy hitters like Wandering Wight emphasize spacing. Black Bear Guai combines everything into your first real test.
My advice for Chapter 1: Don't rush. These early bosses establish the foundation for everything that follows. Master the basics here, and you'll thank yourself later.
Chapter 2-3: The Difficulty Spike
This is where Black Myth: Wukong shows its true colors. There are 17 bosses in Black Myth Wukong's Chapter 2, and many of them will test skills you didn't even know you needed.
Chapter 2's desert setting introduces environmental hazardsthat become crucial later. Sand-based attacks, heat effects, and visibility issues all play important roles in these encounters.
Chapter 3 takes this further with complex multi-phase fights and bosses that require specific strategies rather than general skill. This is where the game separates casual players from dedicated ones.
Chapter 4-6: Mastery Required
The final chapters assume you've mastered everything the game has taught you. There are more than 15 bosses in Black Myth: Wukong's Webbed Hollow, the location at the center of Chapter 4, and each one demands precision and understanding.
Chapter 5 and 6 feature the game's most complex encounters. Multi-phase fights become standard. Environmental interactions become essential, not optional. Every mistake gets punished heavily.
People Also Ask
How Many Bosses Are In Black Myth: Wukong?
There are a total of 113 Bosses including the prologue boss, with 26 Yaoguai Kings, 55 Yaoguai Chiefs, and 32 Characters. This count includes main story bosses, optional encounters, and mini-bosses across all six chapters.
Is There A Best Build Or Weapon For Beating Tougher Bosses?
There’s no single “best” setup, but I found that learning boss patterns and upgrading the right skills gave me the edge I needed more than any specific weapon.
Are There Any Bosses That Are Completely Unfair Or Broken?
While some bosses are significantly more challenging than others, none are truly unfair. Every encounter has learnable patterns and viable strategies. If a boss feels impossible, you're likely missing a key mechanic or approaching it with the wrong strategy.
How Important Is Equipment For Boss Fights?
Equipment matters more than most players realize. The right weapon or accessory can completely change a boss encounter's difficulty. Don't be afraid to experiment with different loadouts, especially for bosses that are giving you trouble.
Final Thoughts
Creating this tier list has been a rewarding journey through one of gaming’s most diverse and creative boss lineups. Black Myth: Wukong doesn’t just challenge you, it teaches you. Each of the 113 bosses brings something different, from intense duels like Erlang Shen and Yellow Loong to quieter encounters that serve as pacing breaks or teach valuable lessons. Even the lower-ranked fights play a role in shaping your growth as a player.
Of course, every tier list is personal. Your toughest boss might be someone else’s easiest. Use this guide as a reference, but let your playstyle and experience shape how you see each encounter. What makes Black Myth: Wukong special is how every fight contributes to an epic, unforgettable journey, one that rewards persistence, patience, and skill at every turn.
Also Check Out: Anime Reborn Tier List
Jump to
My Experience Ranking Every Boss In Black Myth: Wukong
How I Rank These Battles
S-Tier Bosses: The Legendary Encounters
A-Tier Bosses: Elite Encounters
B-Tier Bosses: Solid Challenges
C-Tier Bosses: Standard Encounters
D-Tier Bosses: Forgettable Encounters
Chapter-by-Chapter Boss Progression Guide
People Also Ask
Final Thoughts
Latest Articles
Popular Articles