5 Clever Ways To Preserve Finished Puzzles Without Glue
Save puzzles without glue using wax paper, contact paper, or frames. Learn budget-friendly, mess-free techniques for long-lasting displays.
Mar 25, 202517.6K Shares327.7K Views
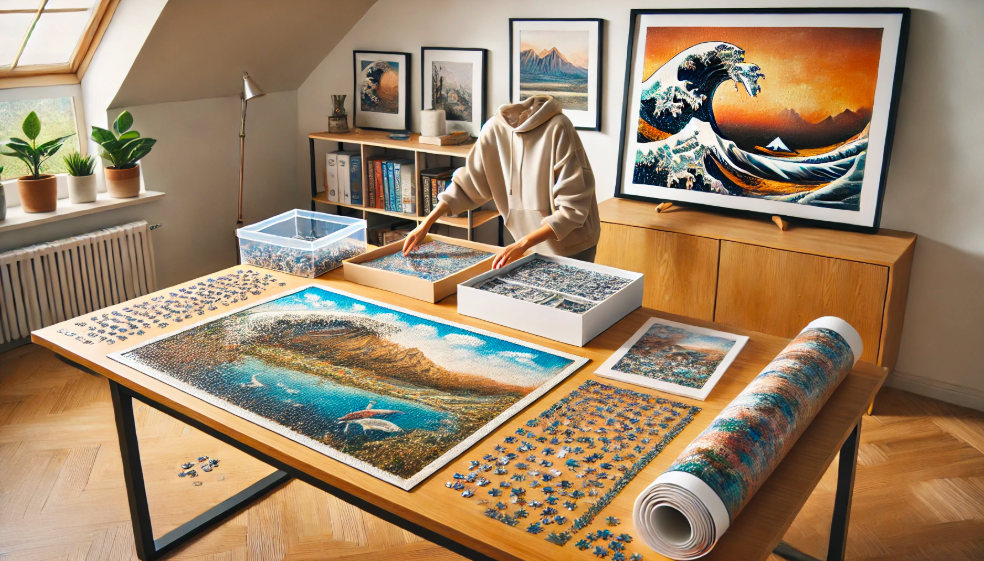
For puzzle enthusiasts, completing a puzzle is a rewarding experience, and many want to preserve their finished puzzle as a work of art. Traditionally, people use glue to hold the pieces together, allowing them to display their puzzle without worrying about it falling apart. However, glue can have downsides: it is messy, permanent, and can damage the puzzle over time.
Today, more and more people are exploring alternative methods for preserving puzzles without gluethat are cleaner, reusable, or less permanent. These methods not only keep the puzzle intact but also give the enthusiast more flexibility in how they display or store their puzzle. Preserving a puzzle without glue opens up new possibilities for creativity, while also being a practical solution for those who want to keep their puzzles in good condition for years to come.
Essential Materials: Building Vector’s Signature Look
1. Orange Jumpsuit
- Details: Bright orange (Pantone 021C), one-piece design with long sleeves. Avoid neon shades or faded orange.
- Sourcing: Search for “orange boiler suits” or “coveralls” on Amazon, eBay, or workwear stores like Dickies. Check secondhand sites (e.g., ThredUp, Depop) for affordable options.
- DIY Tip: Dye a white or light-colored jumpsuit with orange fabric dye (e.g., Rit Dye “Sunshine Orange”). Use synthetic fabric dye for polyester blends.
- Fabric Choice: Cotton-polyester blends are durable and breathable. Avoid shiny materials like satin.
2. White Chest Plate
- Details: A white rectangular panel covering the chest, often with subtle padding.
- Sourcing: Look for white tactical vests or modify a white plastic clipboard cut to size. Etsy sellers offer custom Vector chest plates.
- DIY Tip: Use EVA foam sheets (thick craft foam) painted white. Attach with velcro straps for easy removal.
3. Black-and-White Split Wig
- Details: Short, spiky wig with a sharp horizontal split (black on top, white underneath).
- Sourcing: Cosplay wig stores like Arda Wigs or Epic Cosplay stock split-color wigs. Search “anime split wig” for cheaper options.
- DIY Tip: Buy a black wig and bleach/spray-paint the lower half white. Use fabric-safe spray paint for synthetic wigs.
4. Red Lens Goggles
- Details: Round, oversized goggles with red-tinted lenses and a black frame.
- Sourcing: Motorcycle goggles (Amazon, AliExpress) often have red lenses. Remove inner foam for a sleeker look.
- DIY Tip: Paint clear plastic goggles with red transparent film or nail polish. Sand the frame matte black for accuracy.
5. Black Fingerless Gloves
- Details: Simple, tight-fitting gloves with exposed fingers.
- Sourcing: Buy basic black cycling gloves (Decathlon, Walmart) or “tactical gloves” from army surplus stores.
- DIY Tip: Cut fingers off old black leather gloves. Use fabric glue to prevent fraying.
6. Black Boots with White Accents
- Details: Knee-high black boots with white straps/buckles.
- Sourcing: Thrift combat boots or shop brands like Demonia. Add white details with acrylic paint or white duct tape.
- DIY Tip: Modify cheap black rain boots by gluing white craft foam strips as faux buckles.
7. Black Utility Belt
- Details: Slim belt with small pouches or compartments.
- Sourcing: Look for “tactical belts” on Amazon or army surplus stores. Remove extra hooks/clips for simplicity.
- DIY Tip: Use a black canvas belt and attach pencil cases or small fabric pouches with hot glue.
Key Tips for Accuracy
- Color Matching: Use Pantone 021C as a reference for the jumpsuit. Test fabric swatches in natural light before buying.
- Avoid Cheap Costume Materials: Thin polyester wrinkles easily and looks unrealistic. Opt for thicker cotton blends.
- Prioritize Fit: Vector’s look is sleek. Tailor jumpsuits or use belts to avoid a baggy appearance.
Budget-Friendly Hacks
- Use thrifted items (e.g., old motorcycle gear, workwear) as base materials.
- Swap expensive EVA foam with cardboard sealed with mod podge for armor pieces.
- Repurpose PVC pipes or pool noodles for goggles/chest plate structures.
Perfecting The Orange Jumpsuit: Fit And Details
1. Tailoring the Jumpsuit for a Sleek Fit
- Take in the seams: Use a sewing machine or hand-stitch to tighten loose areas (sides, arms, legs) for a body-hugging look. Pin the excess fabric before sewing to test the fit.
- Hem sleeves and pant legs: Roll or cut excess length to match Vector’s cropped, neat style. Use iron-on hem tape for no-sew fixes.
- Add elastic bands: Sew elastic inside the waistband or cuffs to prevent sagging.
2. Painting Logos and Patches
- Chest logo: Print Vector’s triangular chest emblem as a stencil. Tape it to the jumpsuit and fill with black fabric paint (e.g., Tulip Matte Fabric Paint). Use a small brush for sharp edges.
- Back patches: Copy Vector’s back designs using freezer paper stencils. Iron the freezer paper (shiny side down) onto the fabric to create a sticky surface, then paint.
- Heat-set the paint: After drying, iron the painted area (no steam) to seal the design and prevent cracking.
3. Choosing Breathable Fabric
- Avoid 100% polyester: It traps heat and sweat. Look for 65% cotton + 35% polyester blends for airflow and durability.
- Add ventilation: Sew small mesh panels under the arms or along the inner seams (use black mesh to hide them).
- Pre-shrink the fabric: Wash and dry the jumpsuit before altering to avoid future fit issues.
4. Adjusting the Zipper
- Replace stiff zippers: Swap a bulky zipper with a slim, nylon one (available at craft stores like Joann Fabrics). Use a seam ripper to remove the old zipper.
- Add a zipper pull tab: Attach a leather or fabric tab to make zipping easier. Glue or stitch it to the zipper slider.
- Hide the zipper: Sew a fabric flap over the zipper (if it’s too shiny) using matching orange material.
5. DIY Hacks for Cheap Materials
- Use fabric markers: If you can’t afford fabric paint, draw logos with permanent fabric markers (e.g., Sharpie Stained). Layer colors to avoid fading.
- Reinforce stress points: Sew iron-on patches inside knee, elbow, or seat areas to prevent wear and tear.
- Dye mismatched fabric: Fix uneven orange dye by soaking the entire jumpsuit in a dye bath for 10-15 minutes. Stir constantly for even color.
6. Comfort Tips for Long Wear
- Line the collar: Add soft cotton fabric inside the neckline to prevent itching.
- Attach padded insoles: Sew thin foam inserts into the jumpsuit’s feet area if wearing it with socks/boots.
- Avoid bulk: Remove unnecessary pockets or flaps by cutting them off and sewing the edges shut.
Styling Vector’s Spiky Hair And Goggles
How to Style a Wig for Vector’s Spiky Hair
- Choose a Stiff Synthetic Wig Pick a short, layered synthetic wig with thick fibers. Synthetic holds shape better than human hair. Avoid wigs with heavy curls or waves.
- Trim and Layer the Wig Use sharp scissors to cut uneven layers, focusing on the crown and front. Keep sections shorter at the back and sides to mimic Vector’s jagged look.
- Create Gravity-Defying Spikes Apply strong-hold hair gel or styling glue to small sections. Twist hair upward with your fingers and hold in place for 10–15 seconds. For extra height, backcomb the roots with a fine-tooth comb before shaping spikes.
- Lock the Style with Heat Use a hairdryer on low heat to blast each spike for 5–10 seconds while holding it upright. Finish with a matte hairspray to avoid a shiny, unnatural look.
Hacks to Modify Safety Goggles for Vector’s Techy Look
- Add Silver Metallic Accents Sand the goggles lightly with fine-grit sandpaper. Use silver spray paint or acrylic markers to outline edges, bolts, or faux screws. Let dry for 2 hours. Seal with clear sealant spray.
- Install LED Lights Stick small, battery-powered LED strips (available at craft stores) around the goggles’ frame. Use hot glue or double-sided tape to secure wires. Hide flat coin batteries under the strap or behind the lenses.
- Weather the Goggles for a Worn Look Rub black or brown acrylic paint along the edges with a dry cloth. Wipe off excess to create a scratched, metallic effect. Focus on areas that would naturally collect dirt, like the lens rims.
Accessorize Like A Villain: Shark Puppet And Boots
How to Create or Buy a Shark Puppet
- Buy a Ready-Made Plush Shark PuppetSearch for "plush shark hand puppet" on sites like Etsy, Amazon, or costume shops. Look for designs with sharp teeth, a wide mouth, and a gray-blue color. Puppets with movable jaws (controlled by your hand) add realism.
- DIY Shark Puppet from a Stuffed Animal
Where to Find Military-Style Boots
- Check Army Surplus StoresLook for tactical boots with thick soles, lace-up fronts, and ankle support. Brands like Rothco or surplus military gear shops offer authentic styles under $50.
- Affordable Retailer OptionsStores like Walmart, Target, or ASOS sell "military-inspired" boots. Focus on matte black or dark brown colors, avoid shiny finishes.
Budget-Friendly Substitutes for Shark Puppet and Boots
- Turn a Socks into a Simple Shark PuppetUse a gray crew sock. Cut a mouth shape from the toe area. Glue felt teeth and googly eyes. Slide your hand in to mimic biting motions.
- Upgrade Old Boots with DIY Details
How to Carry Props Confidently
- Practice Puppet MovementsRehearse jaw motions and "swimming" gestures in front of a mirror. Hold the puppet at chest height to keep it visible.
- Walk Boldly in Military BootsWear boots with cushioned insoles for comfort. Stand straight, take firm steps, and avoid shuffling to match a villain’s strong posture.
- Secure Props for Active UseAttach a wrist strap (like a lanyard) to the shark puppet to avoid dropping it. For boots, double-knot laces to prevent tripping.
Mastering Vector’s Mannerisms And Pose
How to Copy Vector’s Jerky Body Language
- Adopt a Stiff, Robotic PostureStand with your chest pushed forward, shoulders slightly raised, and elbows bent at sharp angles. Keep your movements sudden and mechanical, like a puppet on strings. Avoid smooth, flowing motions.
- Practice Jerky Head and Arm Movements
Nailing Vector’s Wide-Eyed Expressions
- Widen Your Eyes DeliberatelyRaise your eyebrows high and stare intensely. Practice in a mirror to avoid looking surprised or scared. Hold the expression for 5 seconds, then relax.
- Combine with a Frozen SmileStretch your lips into a tight, closed-mouth smile while keeping your eyes wide. This creates Vector’s signature “scheming” look.
Mastering the “Oh Yeah!” Pose
- Position Your Arms and LegsCross your arms tightly over your chest, elbows sticking out. Stand with one foot slightly forward, knees bent. Lean your upper body back at a 10–15 degree angle.
- Tilt Your Head and SmirkAngle your head slightly downward while looking up with your eyes. Curl one side of your mouth higher than the other for a cocky smirk.
- Add Finger Guns for Extra FlairBreak the crossed-arm pose briefly to point finger guns at your audience. Snap your hands back into the crossed position quickly.
Practicing the Villainous Smirk
- Train Your Mouth Muscles
- Use Props to Stay in CharacterHold a gadget (e.g., a toy remote) in one hand while smirking. Glance sideways at the prop, as if plotting to use it.
Pro Tips for Events or Photos
- Record yourself practicing poses and replay the video to fix awkward angles.
- Wear tight-fitting clothes to make jerky movements look sharper.
- For group photos, stand slightly apart from others and angle your body away to appear “anti-hero.”
- Practice saying “Oh yeah!” in a nasal, high-pitched voice to match your poses.
FAQs (Title-Aligned Questions Only):
What’s The Cheapest Way To Recreate Vector’s Orange Jumpsuit?
Find an orange work jumpsuit at thrift stores or online marketplaces like eBay (search “men’s orange coveralls”). If unavailable, dye a light-colored jumpsuit with Rit Dyemore Synthetic Fiber Dye in “Sunshine Orange.” For a budget fix, pair an orange long-sleeve shirt with orange sweatpants, and stitch Velcro strips along the sides to mimic a one-piece look. Add black duct tape stripes on legs/arms for Vector’s signature design. Use a printed paper “GRU” logo pinned to the chest with safety pins. Total cost: under $25.
Can I Use Regular Goggles Instead Of Modifying Them For The Costume?
Yes, basic clear-lens safety goggles work if you don’t want to modify them. However, they’ll look less like Vector’s techy style. To improve them cheaply, outline the edges with silver duct tape or metallic nail polish for a “metal frame” effect. Pair them with Vector’s spiky hair and shark puppet to shift focus. For a closer match, buy $5 welding goggles (Amazon/Walmart) and remove the dark tinted lenses.
How Do I Keep The Wig From Slipping During An Event?
Use a wig cap to flatten your hair and create grip. Secure the wig with 4–6 bobby pins crossed in an X shape around the edges. Stick toupee tape or double-sided fashion tape along the wig’s inner band. For active events, spray hairspray on your scalp first to add tackiness. Tighten the wig’s adjustable straps at the back. Avoid windy areas or excessive head-tilting.
Are Vector’s Boots Specific To A Military Style?
Vector’s boots are military-inspired but not a specific real-world design. Look for lace-up ankle boots with thick soles, matte black finish, and minimal branding. Army surplus stores or thrift shops often have similar styles. If unavailable, use plain work boots and glue craft foam “straps” or paint silver accents on the buckles for a match.
Latest Articles
Popular Articles