How To Glue A Puzzle - Easy Steps To Preserve Your Work
Learn how to glue a puzzle without mess or mistakes. Follow simple steps to preserve and display your completed puzzle like a pro.
Jun 21, 202529.2K Shares442.8K Views
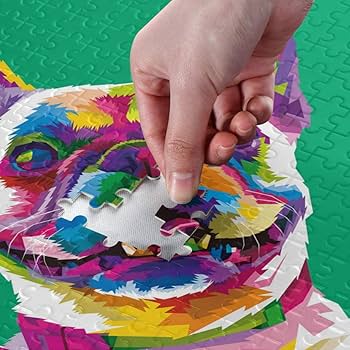
Finishing a puzzle is a special moment. Every piece you placed was part of a bigger picture, and now you have a beautiful image you might want to keep forever. Instead of breaking it apart and putting it back in the box, you can glue your puzzle and display it as art.
This guide walks you through every step, with detailed instructions to ensure a professional result. From choosing the right glue to creative display ideas, you’ll have all the tools to make your puzzle last for years.
Puzzles capture memories, be it a family game night or a solo challenge. Gluing ensures those moments don’t fade. With clear steps, eco-friendly tips, and solutions for common problems, this article helps beginners and seasoned puzzlers alike create a stunning, durable masterpiece. Let’s get started.
Why People Glue Puzzles
1. Saving Your Hard Work
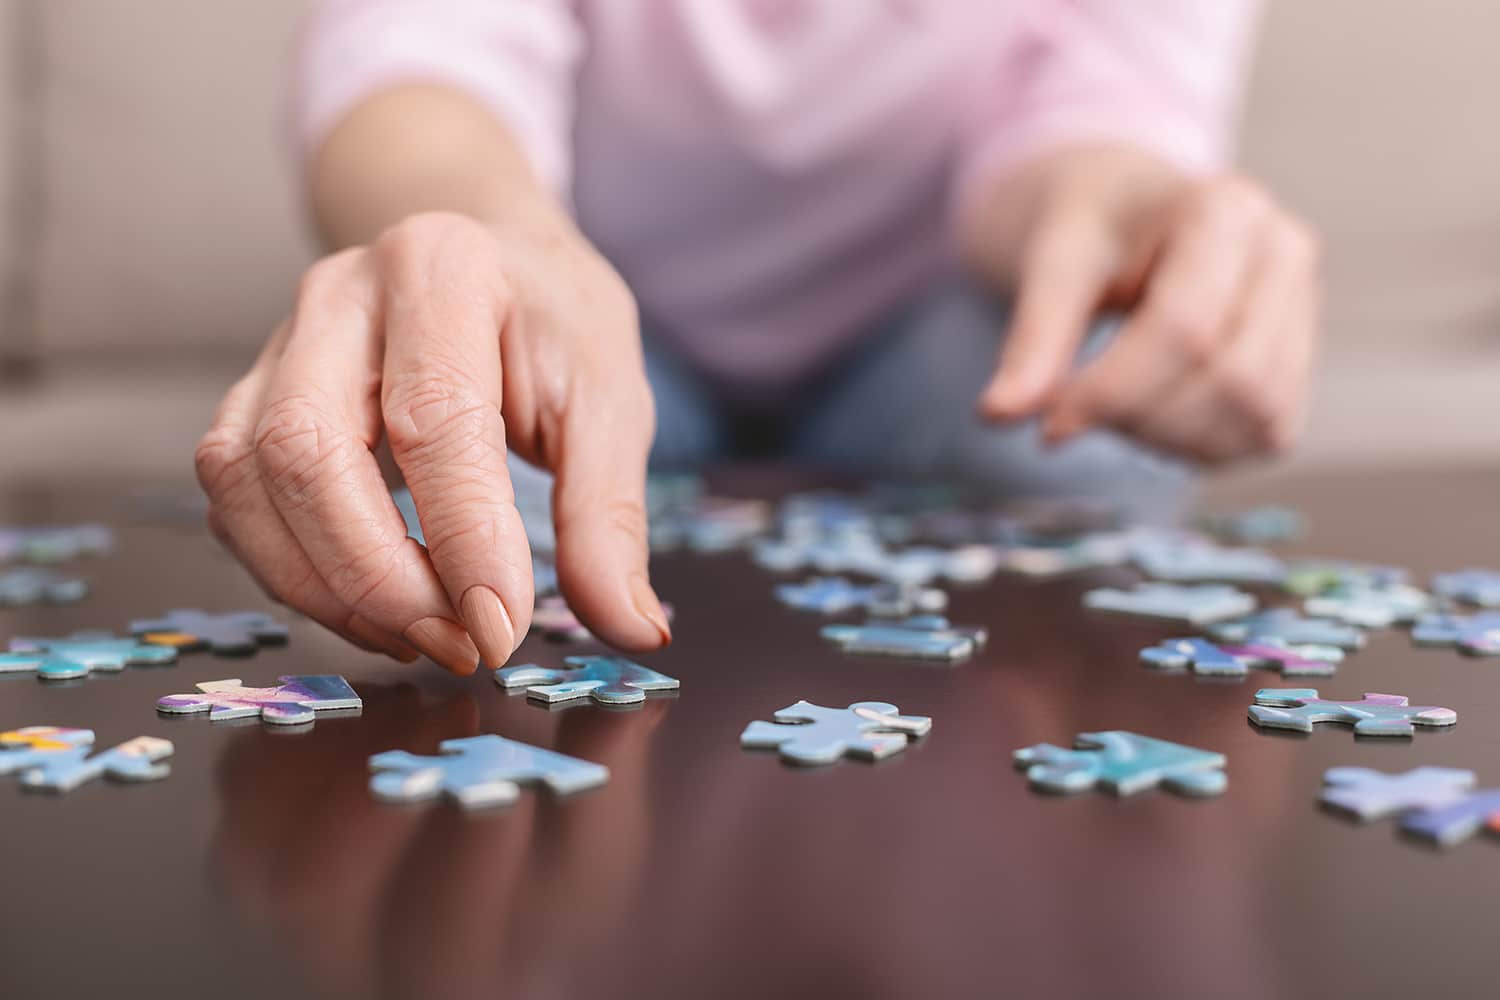
Finishing a puzzle is more than just a hobby for many people, it’s an achievement. Some puzzles take hours, days, or even weeks to complete, especially the larger ones with hundreds or thousands of pieces. Every piece that fits into place is part of a bigger effort.
When you glue your puzzle, you’re protecting all that time and patience. Instead of breaking it apart and putting it back in the box, gluing allows you to keep the whole picture just the way it is. It becomes a lasting reminder of what you accomplished, something you can be proud of every time you see it.
2. Turning A Puzzle Into Art
Puzzles aren’t just games, they’re often beautiful pictures in their own right. From peaceful nature scenes to famous paintings, puzzles can look like real artwork once they’re complete. That’s why many people choose to glue and frame their puzzles.
By gluing your puzzle, you give it a new purpose. What was once just a casual project becomes a permanent decoration. You can hang it on your living room wall, place it on a bookshelf, or even use it as part of a themed display in your home. It’s a simple way to turn your hobby into something artistic and personal.
3. Creating A One-of-a-Kind Gift
A glued puzzle can also make a thoughtful and meaningful gift. Unlike store-bought items, a puzzle you’ve completed and preserved shows effort, creativity, and care. It’s not just a picture it’s a memory.
Think about giving a glued puzzle as a gift that means something special. It could be a scene from a vacation you shared, an image of a pet, or a puzzle with a theme that fits the person’s interests.
What You'll Need To Glue Your Puzzle
1. Puzzle-Safe Glue
Start with the right kind of glue. Regular school glue or craft glue may damage your puzzle over time by making it yellow or warped. Instead, use glue that’s specially made for puzzles. These types of glue are water-based, non-toxic, and designed to dry clear and firm. Some popular puzzle glues include:
- Mod Podge Puzzle Saver
- MasterPieces Puzzle Glue
- PuzzleWorx Puzzle Glue
These brands are safe to use, easy to apply, and often come with a spreading tool in the box.
2. A Spreading Tool
To apply the glue smoothly across the surface, you’ll need something to spread it evenly. Most puzzle glues include a spreading tool like:
- A plastic spatula
- A foam brush
- A soft sponge
If your glue doesn’t come with one, you can use any soft, flat tool that won't damage the puzzle pieces.
3. A Surface Protector
Before you begin gluing, protect the surface you’re working on. Glue can drip off the edges of your puzzle, so it’s best to place something underneath. Good options include:
- Wax paper
- Parchment paper
- A reusable silicone mat
This step keeps your table clean and makes it easier to lift and move the puzzle after gluing.
4. A Backing Board (Optional But Helpful)
If you want to frame your puzzle or hang it up later, you’ll need something sturdy to hold it in place after gluing. A backing board gives your puzzle strength and makes it easier to move. Choose a board that’s slightly larger than your puzzle, such as:
- Foam core board
- Thick cardboard
- Recycled cardboard (for eco-friendly projects)
This step is especially helpful if you plan to display the puzzle long-term.
5. Extra Tools (Optional)
These extra tools can help you get an even better result:
- A rolling pin to flatten the puzzle before or after gluing
- A craft knife to trim the backing board neatly
- Heavy books to press the puzzle flat while it dries
Using these tools is optional, but they can make the process smoother and help the puzzle dry evenly and flat.
Step-by-Step Instructions For Gluing Your Puzzle
Gluing a puzzle is straightforward with careful steps. These detailed instructions guide you through the process, ensuring a strong, clear finish.
Step 1 - Set Up A Clean And Protected Workspace
Choose a flat table to keep your puzzle steady. Cover it with wax paper or parchment paper, extending a few inches beyond the puzzle’s edges to catch glue drips. A reusable silicone mat is an eco-friendly alternative that’s easy to clean.
Gently wipe the puzzle with a soft, dry cloth to remove dust or crumbs, ensuring the glue sticks evenly. This preparation keeps your table safe and your puzzle clean for a smooth gluing process.
Step 2 - Confirm Your Puzzle Is Complete And Flat
Check that every puzzle piece is in place before gluing. A missing piece weakens the structure and spoils the image. If you notice a gap, contact the puzzle manufacturer, many provide free replacements.
Once confirmed, roll a rolling pin gently over the puzzle to press pieces together, creating a flat surface. This prevents glue from pooling in uneven spots, which can distort the finish. Taking time here ensures a polished result.
Step 3 - Select The Right Glue For Your Puzzle
The glue you choose affects the puzzle’s look and durability. Liquid glues, like Mod Podge Puzzle Saver or MasterPieces, are beginner-friendly and offer matte or glossy finishes, matte for soft images, glossy for vibrant ones. Spray glues, such as Loctite Spray Adhesive, dry quickly and suit large puzzles over 2000 pieces.
Powder glues, which you mix with water, are strong for oversized puzzles but take more effort. For eco-conscious crafters, PuzzleWorx is non-toxic and water-based. Test a small amount on a spare piece to check the finish. Picking the right glue keeps your puzzle clear and sturdy.
Step 4 - Apply Glue To The Front Surface
Pour about a quarter cup of glue into the puzzle’s center for a 1000-piece puzzle, adjust for smaller or larger sizes. Use a foam brush or spatula to spread it thinly, covering every piece and edge. Move in one direction, like stroking a paintbrush, to avoid streaks or uneven patches.
Too much glue can make the puzzle soggy or cloudy, so wipe excess onto the wax paper. If air bubbles appear, press them out gently with the spatula before the glue dries. Spreading carefully takes a few minutes but gives a professional, crystal-clear finish.
Step 5 - Allow The Glue To Dry Fully
Drying time depends on the glue: liquid glues need 3 to 5 hours, spray glues take 10 to 15 minutes, and powder glues require 4 to 6 hours. Check the glue’s label for exact times. Place the puzzle in a clean, dust-free area, away from pets or kids who might disturb it.
In humid climates, a small fan can speed drying without moving the puzzle. Don’t touch it until it’s fully dry to avoid smudges or sticky spots. Patience here ensures a strong, lasting bond.
Step 6 - Glue The Back For Added Strength (Optional)
For large puzzles or those you’ll frame, gluing the back adds durability. Slide a piece of cardboard under the puzzle, place another on top, and flip it carefully to avoid shifting pieces. Spread a thin layer of glue on the back, just like the front, ensuring every part is covered lightly.
Let it dry for 3 to 5 hours in a flat, clean spot. This step prevents curling and strengthens the puzzle, especially for pieces over 1000 pieces. It’s optional but highly recommended for display projects.
Step 7 - Mount The Puzzle For Display Or Framing
Mounting creates a solid base for hanging or framing. Choose a foam core board or thick cardboard slightly larger than your puzzle. Spread a thin layer of puzzle glue or craft glue on the board, then carefully place the puzzle on top, aligning it evenly. Press it down with a rolling pin to ensure it sticks.
Cover with wax paper and stack heavy books on top to keep it flat while drying, which takes about 24 hours. Trim excess board with a craft knife or leave a border for framing. Mounting makes your puzzle ready for display.
Read More on - Clear Puzzle Assembly Tips For Fast & Easy Completion
Creative Ways To Display Your Glued Puzzle
Once your puzzle is glued and dried, there are many fun and stylish ways to show it off. Instead of putting it back in the box, try turning your puzzle into a piece of home décor. Here are some creative ideas to help you proudly display your work.
1. Frame It Like Artwork
One of the most popular ways to display a glued puzzle is to frame it, just like a painting or poster. You can use a poster frame or have a custom frame made to fit your puzzle exactly.
For added protection and long-lasting color, choose a frame with UV-protective glass. This helps prevent fading from sunlight and gives your puzzle a polished, gallery-style look. Hang it in a hallway, living room, or office to add a personal touch to your space.
2. Go Frameless For A Clean Look
If you’re looking for a simple and modern display, you don’t have to use a frame at all. Instead, you can hang your glued puzzle directly on the wall using 3M picture hanging strips, tack putty, or reusable adhesive.
This method is budget-friendly and keeps your walls damage-free. It also gives your puzzle a minimalist, floating effect that can look very stylish in smaller spaces or kids’ rooms.
3. Make Puzzle Drink Coasters
For a unique and useful idea, turn your finished puzzle into drink coasters. Choose a small puzzle or cut a larger puzzle into smaller squares, about 4x4 inches each. Glue each square securely, then seal them with clear epoxy resin.
This will make them water-resistant and strong enough to hold mugs or glasses. These puzzle coasters make great conversation pieces for your coffee table and also work as handmade gifts.
4. Design A Puzzle Serving Tray
Another creative idea is to make a serving tray from your glued puzzle. Start by gluing your puzzle onto a wooden tray. Once it’s dry, seal the surface with clear resin to protect the puzzle and give it a glossy shine.
You can then add handles to the sides of the tray to make it easy to carry. Use this tray for serving snacks at parties, or simply leave it out as a decorative centerpiece on your kitchen or coffee table.
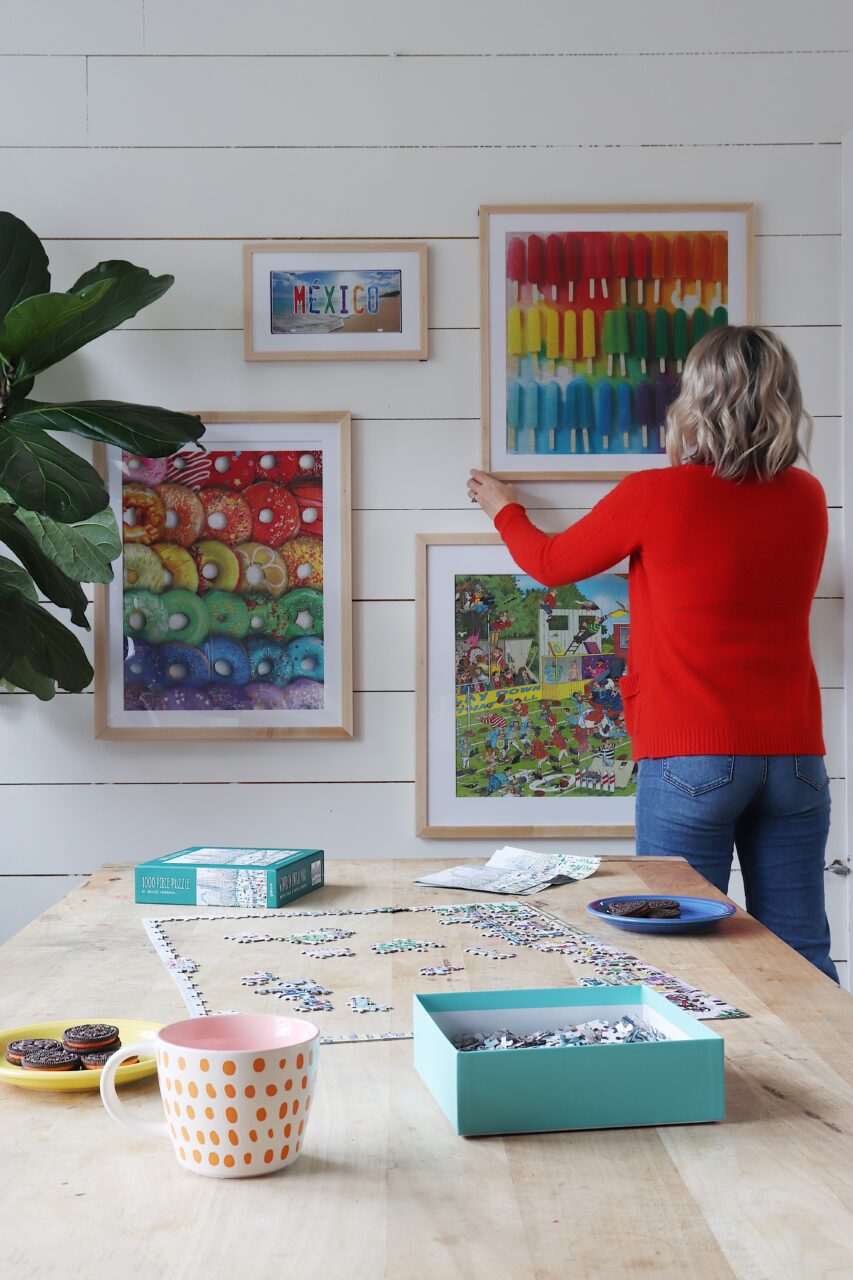
5. Create A Puzzle Gallery Wall
If you enjoy doing puzzles often, you can turn your collection into an entire gallery wall. Pick a few of your favorite finished puzzles in different sizes and hang them together on one wall.
Mix themes, colors, and styles to give the space a fun, artsy vibe. Whether they’re landscapes, animals, or abstract designs, this gallery can show off your personality and all the time you’ve spent building puzzles.
Top Puzzle Glues For A Perfect Finish
Choosing the right glue for your puzzle is essential to preserve its beauty and ensure it stays intact for years. The best puzzle glue will not only secure the pieces but also enhance the colors and protect your hard work from fading. Here are five top puzzle glues, each selected for their excellent performance, ease of use, and positive user feedback.
1. Mod Podge Puzzle Saver
Price Range:$8-$10Finish:Matte
Mod Podge Puzzle Saver is a go-to option for many puzzle enthusiasts, especially beginners. Its matte finish is perfect for reducing glare, so your glued puzzle can be displayed in any lighting without shiny reflections. The formula dries quickly and evenly, making it simple to apply with a foam brush.
This glue is not only affordable but also versatile, as it can be used on a wide variety of crafts beyond puzzles. If you're working on a tight budget and want a reliable option, Mod Podge Puzzle Saver is a great choice.
2. MasterPieces Puzzle Glue
Price Range:$12-$15Finish:Glossy
For those who want their puzzle to have a vibrant, glossy finish, MasterPieces Puzzle Glue is an excellent option. This glue enhances the colors of your puzzle, giving it a shiny look that makes the details pop. It comes with a spatula for easy and even application, ensuring that no area is left uncovered.
Ideal for puzzles with bright, intricate designs, this glue will make your puzzle feel like a professional piece of artwork. If you love a high-shine finish that elevates the puzzle’s colors, this one is a top contender.
3. PuzzleWorx Easy-On Glue
Price Range:$10-$12Finish:Matte
PuzzleWorx Easy-On Glue is an eco-friendly, non-toxic option that’s safe for all ages, making it perfect for family crafting projects. Its water-based formula is easy to use and dries to a smooth, matte finish that doesn't distort the puzzle's appearance.
PuzzleWorx is an excellent choice for environmentally conscious crafters, as it is free from harmful chemicals. The matte finish is ideal for those who prefer a more subtle, understated look for their puzzles, with the added peace of mind that it’s safe for children and pets.
4. RoseArt Puzzle Glue
Price Range:$9-$11Finish:Glossy
RoseArt Puzzle Glue offers a fast-drying solution that leaves your puzzle with a glossy, shiny finish. It’s perfect for those who want to display their finished puzzles right away. This glue includes an applicator, which makes spreading it over the puzzle quick and hassle-free.
RoseArt is designed to be easy to use and is a great option if you're new to gluing puzzles. The glossy finish makes the colors stand out and gives your puzzle a professional, museum-quality appearance.
5. Loctite Spray Adhesive
Price Range:$15-$18Finish:Glossy (Spray Application)
If you’re working with large puzzles, Loctite Spray Adhesive is a game-changer. This fast-drying spray glue provides an even coat that covers large puzzle surfaces quickly. The glossy finish brings out vibrant colors while keeping the puzzle looking fresh and new.
Loctite Spray Adhesive is perfect for those who want a more efficient, time-saving method of gluing without sacrificing quality. Its fast-drying formula means less waiting around, and it’s particularly useful for intricate or oversized puzzles that need quick and even coverage.
Eco-Friendly Gluing Options For Sustainable Crafting
Sustainable crafting doesn’t just benefit the environment; it also ensures that your puzzle art projects are safe for everyone involved. Using eco-friendly glues and materials is an easy and effective way to reduce your environmental footprint while still achieving high-quality results. Below are some key ways to glue your puzzle in a more sustainable manner.
1. Non-Toxic, Water-Based Puzzle Glues
PuzzleWorx Easy-On Glue and certain Mod Podge formulas offer non-toxic, water-based adhesives that are safe for both people and the planet. These glues contain fewer chemicals and are biodegradable, which means they won’t release harmful substances into the environment when disposed of.
These glues are great choices for environmentally conscious crafters, as they don’t compromise on quality or durability while offering a safer, eco-friendly alternative.
2. Recycled Cardboard And Eco-Friendly Foam Core For Mounting
Instead of using plastic-based mounting boards, opt for recycled cardboard or eco-friendly foam core. Recycled cardboardis a sturdy and sustainable option that works well for supporting your puzzle after it’s glued. Eco-friendly foam core options are available that are made from renewable resources and are free from harmful chemicals.
These materials offer the same structural integrity and support as their plastic counterparts but with less environmental impact. Recycled cardboard is also a great choice for those looking to make the most out of what they already have at home, such as old cereal boxes or packaging materials, turning them into something useful and beautiful.
3. Wax Paper Or Reusable Silicone Mats For Surface Protection
Instead of using single-use paper or plastic sheets, wax paper and reusable silicone mats serve as excellent alternatives when gluing puzzles. Wax paper is perfect for preventing the glue from sticking to your work surface, and it can be reused multiple times. A silicone mat is another sustainable option, as it’s easy to clean, non-stick, and designed for repeated use.
By using these tools, you not only save on disposable items but also create less waste, which is a crucial aspect of sustainable crafting. Silicone mats, in particular, are durable and can be used for many other projects, making them a versatile tool in eco-friendly crafting.
4. Recycling Empty Glue Containers
When your glue container is empty, don’t just toss it in the trash. Instead, recycle the glue container if possible. Many puzzle glues come in bottles made of recyclable materials like plastic or glass. If you can, rinse out the container before recycling it to ensure it’s free from leftover adhesive.
This simple step contributes to reducing waste and ensuring that the materials are processed and repurposed efficiently.
5. Bamboo Frames For A Fully Eco-Friendly Display
For an entirely sustainable approach to displaying your finished puzzle, consider using a bamboo frame. Bamboo is a fast-growing, renewable resource that requires little water or chemicals to grow, making it a highly sustainable material.
Bamboo frames not only look stylish but also have a much lower environmental impactcompared to traditional wood or plastic frames. They are durable, lightweight, and provide a natural aesthetic that complements your puzzle artwork.tices.
Troubleshooting Common Problems When Gluing Puzzles
Sometimes things don’t go perfectly when gluing a puzzle, especially if it's your first time. Here’s how to handle a few common problems and make sure your finished puzzle looks great.
Puzzle Pieces Are Curling Or Warping After Drying
If the edges or corners of your puzzle begin to curl up after the glue dries, it’s usually because the moisture from the glue causes the puzzle to shrink slightly on the front side. This change in balance makes the cardboard warp or bend.
To fix this, wait until the front of your puzzle is completely dry, then gently flip it over. Apply a thin layer of puzzle glue to the back. Make sure it’s spread evenly, covering the whole surface.
Once that’s done, place a flat board or a clean piece of cardboard over the puzzle, and then add some weight, such as a few heavy books. Leave it like this overnight. This helps the puzzle flatten out by balancing the moisture on both sides and keeping it pressed down while it dries.
Glue Dripped Or Made A Mess
Glue can sometimes drip off the edges of the puzzle or pool under it, especially if too much is applied. This not only causes a mess but can also stick the puzzle to the surface underneath or leave visible glue marks around the edges.
If you're working on a table without protection, the glue can damage both the puzzle and your furniture. The best way to avoid this is to always place a non-stick surface, like wax paper, parchment paper, or a silicone craft mat, under the puzzle before gluing. These materials won’t absorb the glue or stick to the puzzle.
Avoid using newspaper because the glue can soak through and cause the ink to transfer onto the puzzle’s surface. If glue does spill or drip, gently wipe it away with a damp cloth before it dries. If it has already dried, carefully peel off the extra glue or lightly sand the area with very fine sandpaper.
The Puzzle Surface Looks Cloudy Or Streaky
A cloudy or streaky appearance on your puzzle after gluing is often caused by using too much glue or not spreading it evenly. Sometimes, this can also happen if you use a glue that isn’t meant for puzzles. Regular white craft glue, for example, can dry cloudy or create a rough texture.
To avoid this problem, use a small amount of puzzle-specific glue and make sure to spread it in a thin, even layer across the entire surface. A foam brush or plastic spatula works best for this. Let the first coat dry completely before deciding if you need to apply a second coat. If you apply too much at once, the glue can clump or dry unevenly.
Choosing a glue that’s designed for puzzles, such as Mod Podge Puzzle Saver or other clear-drying adhesives, will also help you get a smooth, glossy finish without streaks or fogginess. If your puzzle already looks cloudy, adding another thin layer of the correct glue might help smooth it out and bring back some shine.
People Also Ask
Is Puzzle Glue Or Tape Better?
Painter's tape is so much stronger than puzzle glue!
Do You Glue The Front Or Back Of A Puzzle?
You can glue either the front, the back, or both! Clear puzzle glues work best for the front but might alter the shade or finish of your puzzle. You can also glue the back if you can manage to flip the completed puzzle over.
How Many Coats Of Puzzle Glue Do I Need?
Be careful not to apply too much glue to your puzzle, or it will soak up the glue and distort the puzzle. After applying a thin first layer of puzzle glue or Mod Podge, let it dry for about 20 minutes. Once the glue has dried, apply a second layer over the whole puzzle.
Does Puzzle Glue Expire?
Just like with most natural products, glues have an expiration date.
Final Thoughts
Preserving your completed puzzle through proper gluing techniques creates lasting artwork that showcases your patience and skill. By following these detailed steps and professional recommendations, you'll achieve museum-quality results that protect your puzzle for years of enjoyment.
Remember that careful preparation and patience during the drying process make all the difference in creating a flawless finished piece.
Jump to
Why People Glue Puzzles
What You'll Need To Glue Your Puzzle
Step-by-Step Instructions For Gluing Your Puzzle
Creative Ways To Display Your Glued Puzzle
Top Puzzle Glues For A Perfect Finish
Eco-Friendly Gluing Options For Sustainable Crafting
Troubleshooting Common Problems When Gluing Puzzles
People Also Ask
Final Thoughts
Latest Articles
Popular Articles